

The ESP32 has a lot more internal RAM than the ESP8266 had. You can extend it even more by addressing up to 4MB of external SPI RAM memory. In this article you will learn how to use the PSRAM in your projects.
Especially when working with graphical applications you can never have enough working memory. For instance, our Minigrafx library allocates a frame buffer first in RAM. Then all drawing operations use only on this memory. After the application finishes drawing a frame it tells the library to write the complete content of the frame buffer to the display. For a display with 320×240 pixel and 16bit of color information per pixel this makes 150kb only for the frame buffer.
The ESP8266 has by far not enough RAM to hold this amount of information in the RAM. That’s why we used an old trick known from the first home computers to reduce the color information per pixel. Instead of 16bit “True Color” we use a palette of defined colors. Before the library writes the frame buffer to the display it looks up the real color value and replaces the palette index with that value. With a palette of 4 colors, we only need 2 bits per pixel (2^2) or roughly 19kb!
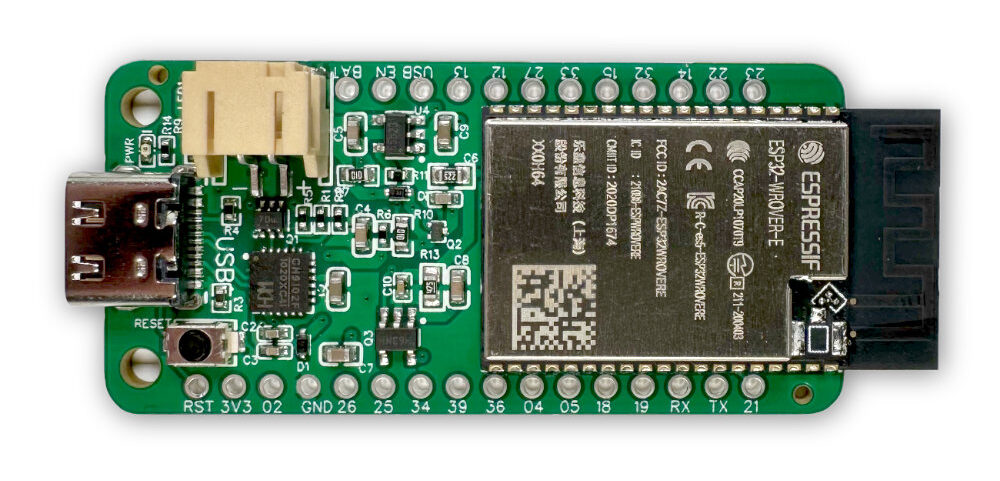
ESP-WROVER-B: 8MB of PSRAM?
Espressif, the manufacturer of the ESP32, sells a module called ESP-WROVER-B and it is often advertised with 8MB of PSRAM. PSRAM stands for pseudo static RAM. It might be true that the module comes with an external 8MB PSRAM chip but as a matter of fact you can (currently?) only use the lower 4MB in your applications. Don’t get me wrong, 4MB is still a lot of RAM for a microcontroller but the 8MB ads are a bit misleading.
If we believe Espressif’s description of external PSRAM then the 4MB limit is rather based on silicon limitations than limitations in the ESP-IDF framework. The page states “It can be insufficient for some purposes, so ESP32 has the ability to also use up to 4 MB of external SPI RAM memory.” This sounds more like a hard limit and not one that will be soon removed by further work on the SDK.
and comes with 8MB of flash and 8MB of PSRAM. It costs only USD $14.95!
How Much RAM is available?
So how do you use this external RAM? Before we get into that let’s make sure that our ESP32 module has this external PSRAM and that it is addressable from our code. The ESP32/Arduino platform exposes a couple of methods to find out how much RAM you have in total and how much you can use.
#include <Arduino.h>

void setup() {
  log_d("Total heap: %d", ESP.getHeapSize());
  log_d("Free heap: %d", ESP.getFreeHeap());
  log_d("Total PSRAM: %d", ESP.getPsramSize());
  log_d("Free PSRAM: %d", ESP.getFreePsram());
}

void loop() {}
Note that I’m using the logging macro log_d(..) which allows us to later disable the log output. If we run this code in the Arduino IDE with the following settings in the tool menu. Especially make sure that you have the Core Debug Level set to Verbose.

Running the code shows us the following lines in the Serial Monitor:
[D][esp32-hal-psram.c:47] psramInit(): PSRAM enabled
[D][PSRAMTestArduino.ino:4] setup(): Total heap: 393356
[D][PSRAMTestArduino.ino:5] setup(): Free heap: 367948
[D][PSRAMTestArduino.ino:6] setup(): Total PSRAM: 4194252
[D][PSRAMTestArduino.ino:7] setup(): Free PSRAM: 4194252
Great! The log output tells us that the PSRAM is on and that we have 4MB of PSRAM available. If we run the same code in the Platformio IDE we get this:
[D][main.cpp:4] setup(): Total heap: 390484
[D][main.cpp:5] setup(): Free heap: 365140
[D][main.cpp:6] setup(): Total PSRAM: 0
[D][main.cpp:7] setup(): Free PSRAM: 0
Hm, strange, isn’t it? Maybe I chose the wrong board. This is configured in the platformio.ini:
[env:esp-wrover-kit]
platform = espressif32
board = esp-wrover-kit
framework = arduino
monitor_speed = 115200
upload_speed = 921600
build_flags = -DCORE_DEBUG_LEVEL=5
Please note that the last line is required to see the log_d(..) output. But why we don’t see the PSRAM? It turns out that we need to enable PSRAM configuration manually. We have to enable this by adding a build flag to the platformio.ini:
build_flags = -DCORE_DEBUG_LEVEL=5
              -DBOARD_HAS_PSRAM
              -mfix-esp32-psram-cache-issue
BOARD_HAS_PSRAM enables PSRAM support and fix-esp32-psram-cache-issue is a workaround for a sequence of code which can crash the board when PSRAM is enabled. Read more about this here.
How To Use the PSRAM?
In the last paragraph, we have seen how we can make sure that PSRAM is available. Now we’re going to see how we can use it. According to the Espressif manual, there are four ways to use the PSRAM. In this blog post we are only going to look at one.
The internal RAM is already quite big. So you are most likely going to use the external memory to allocate a relatively big buffer. For this, we can use ps_malloc() and free() to release the memory. Let’s see where the memory is allocated with this little program:
#include <Arduino.h>

void logMemory() {
  log_d("Used PSRAM: %d", ESP.getPsramSize() - ESP.getFreePsram());
}

void setup() {
  logMemory();
  byte* psdRamBuffer = (byte*)ps_malloc(500000);
  logMemory();
  free(psdRamBuffer);
  logMemory();
}

void loop() {}
Running the code show this on the serial console:
[D][esp32-hal-psram.c:47] psramInit(): PSRAM enabled
[D][main.cpp:4] logMemory(): Used PSRAM: 0
[D][main.cpp:4] logMemory(): Used PSRAM: 500000
[D][main.cpp:4] logMemory(): Used PSRAM: 0
Congratulations, you have just successfully allocated memory in the external PSRAM!
More about PSRAM
If you like to know more about PSRAM then the esp32-hal-psram.c file from the ESP32/Arduino platform is an interesting source. There we find other functions we haven’t covered in this post:
bool psramFound();
void *ps_malloc(size_t size);
void *ps_calloc(size_t n, size_t size);
void *ps_realloc(void *ptr, size_t size);
For instance, you can use psramFound() to check if pseudo ram is available, rather than checking for the size of available external memory.
Summary
In this blog post, we looked at how we can make sure that PSRAM is available in our application code. We then looked at how we can use it to allocate memory. We also learned that the ESP32 is limited to 4MB of PSRAM, even if some boards come with 8MB chips.
If you like this post about using the PSRAM in your ESP32 applications, then you might also like the other articles about what you learn if you attend a ThingPulse ESP32 workshop. Subscribe to this site’s feed with your favorite RSS reader or follow us on Twitter to never miss new content.
Hi Daniel,
The example on https://github.com/espressif/esp-idf/tree/master/examples/system/himem suggests that you can actually use the upper 4MB PSRAM of the WROVER-B.
Paul
Thanks for pointing that out Paul.
Thank you very much for this great article ! I ve just migrate from Arduino IDE to platformio.
I’d a problem with a TTGO ESP32 CAM (WRover) on platformio that I did not encounter on Arduino camera_fb_init(): Allocating 375 KB frame buffer Failed … camera_init(): Failed to allocate frame buffer… GPIO isr service is not installed, … Camera init failed with error 0x101
This is solved. Thanks to your article as I was trying to get this information :
build_flags = -DBOARD_HAS_PSRAM
-mfix-esp32-psram-cache-issue
Thanks a lot !
Thank you Jean-Pierre, glad it was helpful.
Hi i was trying to do this same thing with esp32s2 but it shows some error that psram is not available.
Can someone help me out?
That was informative session, However i am struggling to move the functions in to the PSRAM, like moving BLE.init() function from internal ram to external PSRAM, can you please guide on that part.
Thanks in advance.
Hi Dinesh . Are u able to allocate memory for ble.init() form PSRAM . Can you tell me how did u do that .
Thanks for taking the time to share this.
I have an issue, I am not getting the partitions:
E (494) esp_core_dump_fxf͡� No core dump partition found!
E (494) esp_core_dump_flash: No core dump partition found!
Code
//#define CAMERA_MODEL_M5STACK_UNITCAM // No PSRAM
#define CAMERA_MODEL_AI_THINKER // Has PSRAM
//#define CAMERA_MODEL_TTGO_T_JOURNAL // No PSRAM
// ** Espressif Internal Boards **
//#define CAMERA_MODEL_ESP32_CAM_BOARD
//#define CAMERA_MODEL_ESP32S2_CAM_BOARD
//#define CAMERA_MODEL_ESP32S3_CAM_LCD
#include “camera_pins.h”
// ===========================
// Enter your WiFi credentials
// ===========================
const char* ssid = “O”;
const char* password = “d1”;
void startCameraServer();
void setupLedFlash(int pin);
void setup() {
Serial.begin(115200);
Serial.setDebugOutput(true);
Serial.println();
camera_config_t config;
config.ledc_channel = LEDC_CHANNEL_0;
config.ledc_timer = LEDC_TIMER_0;
config.pin_d0 = Y2_GPIO_NUM;
config.pin_d1 = Y3_GPIO_NUM;
config.pin_d2 = Y4_GPIO_NUM;
config.pin_d3 = Y5_GPIO_NUM;
config.pin_d4 = Y6_GPIO_NUM;
config.pin_d5 = Y7_GPIO_NUM;
config.pin_d6 = Y8_GPIO_NUM;
config.pin_d7 = Y9_GPIO_NUM;
config.pin_xclk = XCLK_GPIO_NUM;
config.pin_pclk = PCLK_GPIO_NUM;
config.pin_vsync = VSYNC_GPIO_NUM;
config.pin_href = HREF_GPIO_NUM;
config.pin_sscb_sda = SIOD_GPIO_NUM;
config.pin_sscb_scl = SIOC_GPIO_NUM;
config.pin_pwdn = PWDN_GPIO_NUM;
config.pin_reset = RESET_GPIO_NUM;
config.xclk_freq_hz = 20000000;
config.frame_size = FRAMESIZE_UXGA;
config.pixel_format = PIXFORMAT_JPEG; // for streaming
//config.pixel_format = PIXFORMAT_RGB565; // for face detection/recognition
config.grab_mode = CAMERA_GRAB_WHEN_EMPTY;
config.fb_location = CAMERA_FB_IN_PSRAM;
config.jpeg_quality = 12;
config.fb_count = 1;
// if PSRAM IC present, init with UXGA resolution and higher JPEG quality
// for larger pre-allocated frame buffer.
if(config.pixel_format == PIXFORMAT_JPEG){
if(psramFound()){
config.jpeg_quality = 10;
config.fb_count = 2;
config.grab_mode = CAMERA_GRAB_LATEST;
} else {
// Limit the frame size when PSRAM is not available
config.frame_size = FRAMESIZE_SVGA;
config.fb_location = CAMERA_FB_IN_DRAM;
}
} else {
// Best option for face detection/recognition
config.frame_size = FRAMESIZE_240X240;
#if CONFIG_IDF_TARGET_ESP32S3
config.fb_count = 2;
#endif
}
#if defined(CAMERA_MODEL_ESP_EYE)
pinMode(13, INPUT_PULLUP);
pinMode(14, INPUT_PULLUP);
#endif
// camera init
esp_err_t err = esp_camera_init(&config);
if (err != ESP_OK) {
Serial.printf(“Camera init failed with error 0x%x”, err);
return;
}
Hi,
more than three years later, this post is still helpfull.
Even for someone that has been writing sketchs during ten years.
I have learned many things.
Thanks